3D Printed bronchia necklace
Inspiration

Image Source: Schiaparelli
I've long been obsessed with Schiaparelli's ornate necklace shown above. The piece features a brionchial tree gilded in brass and it likely costs thousands of dollars and hundreds of hours of labor to create. I neither of these things, but this week I have access to a couple 3D printers and some gold-colored filament, so I thought this was the moment to come close to my Haute Couture dreams. I also thought that the small branches would be a good test for the limits of our printers, especially given that I couldn't imagine easily fabricating this shape with any other tools on hand.Neck Chain
For the chain, I wanted something that was scalable and linked together easily. With some scouring of free online respostories, I found two designs for a chain. The first was a print-in-place design that printed 50 cm of chain length at a time.


This was my first experience with 3D printing, so I was keen to really understand the different slicing and printing settings and how different combinations affected the final product. So to do some rapid testing, I needed to scale down the design above. I loaded the model of the 70 link chain into Fusion360. I had not used Mesh editing features before, but all I wanted to do was to cut down the parts until I had a 3 link chain, so I was able to proceed after some self-teaching.
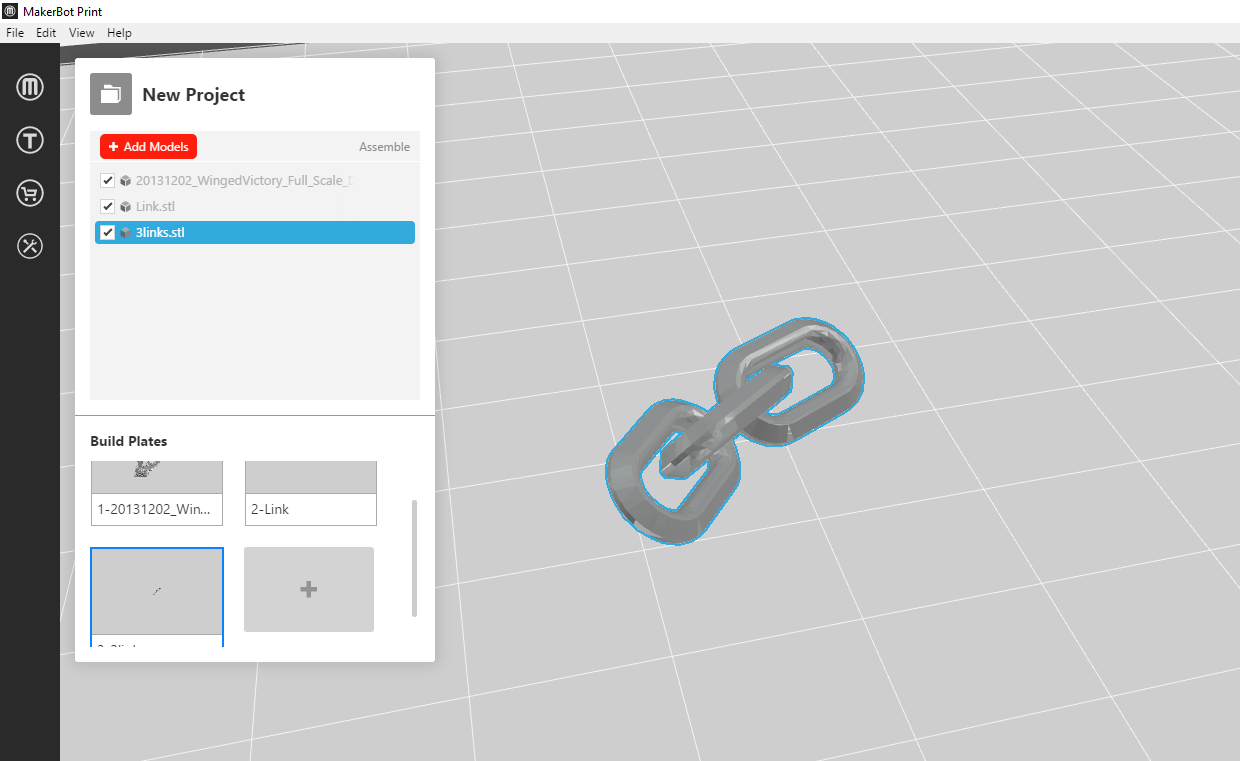
During this point of the project, I was working in the Lowell Makerspace, which uses a Makerbot Replicator+ printer. I downloaded its slicing software and loaded the 3 link chain scaled to 1.5cm and created the g-code with its default settings. The result is Number 1 in my set of testing iterations. While I could forsee some advantages to creating a print-in-place chain, this design seemed to require more support material and the orientation of each link was at an angle.
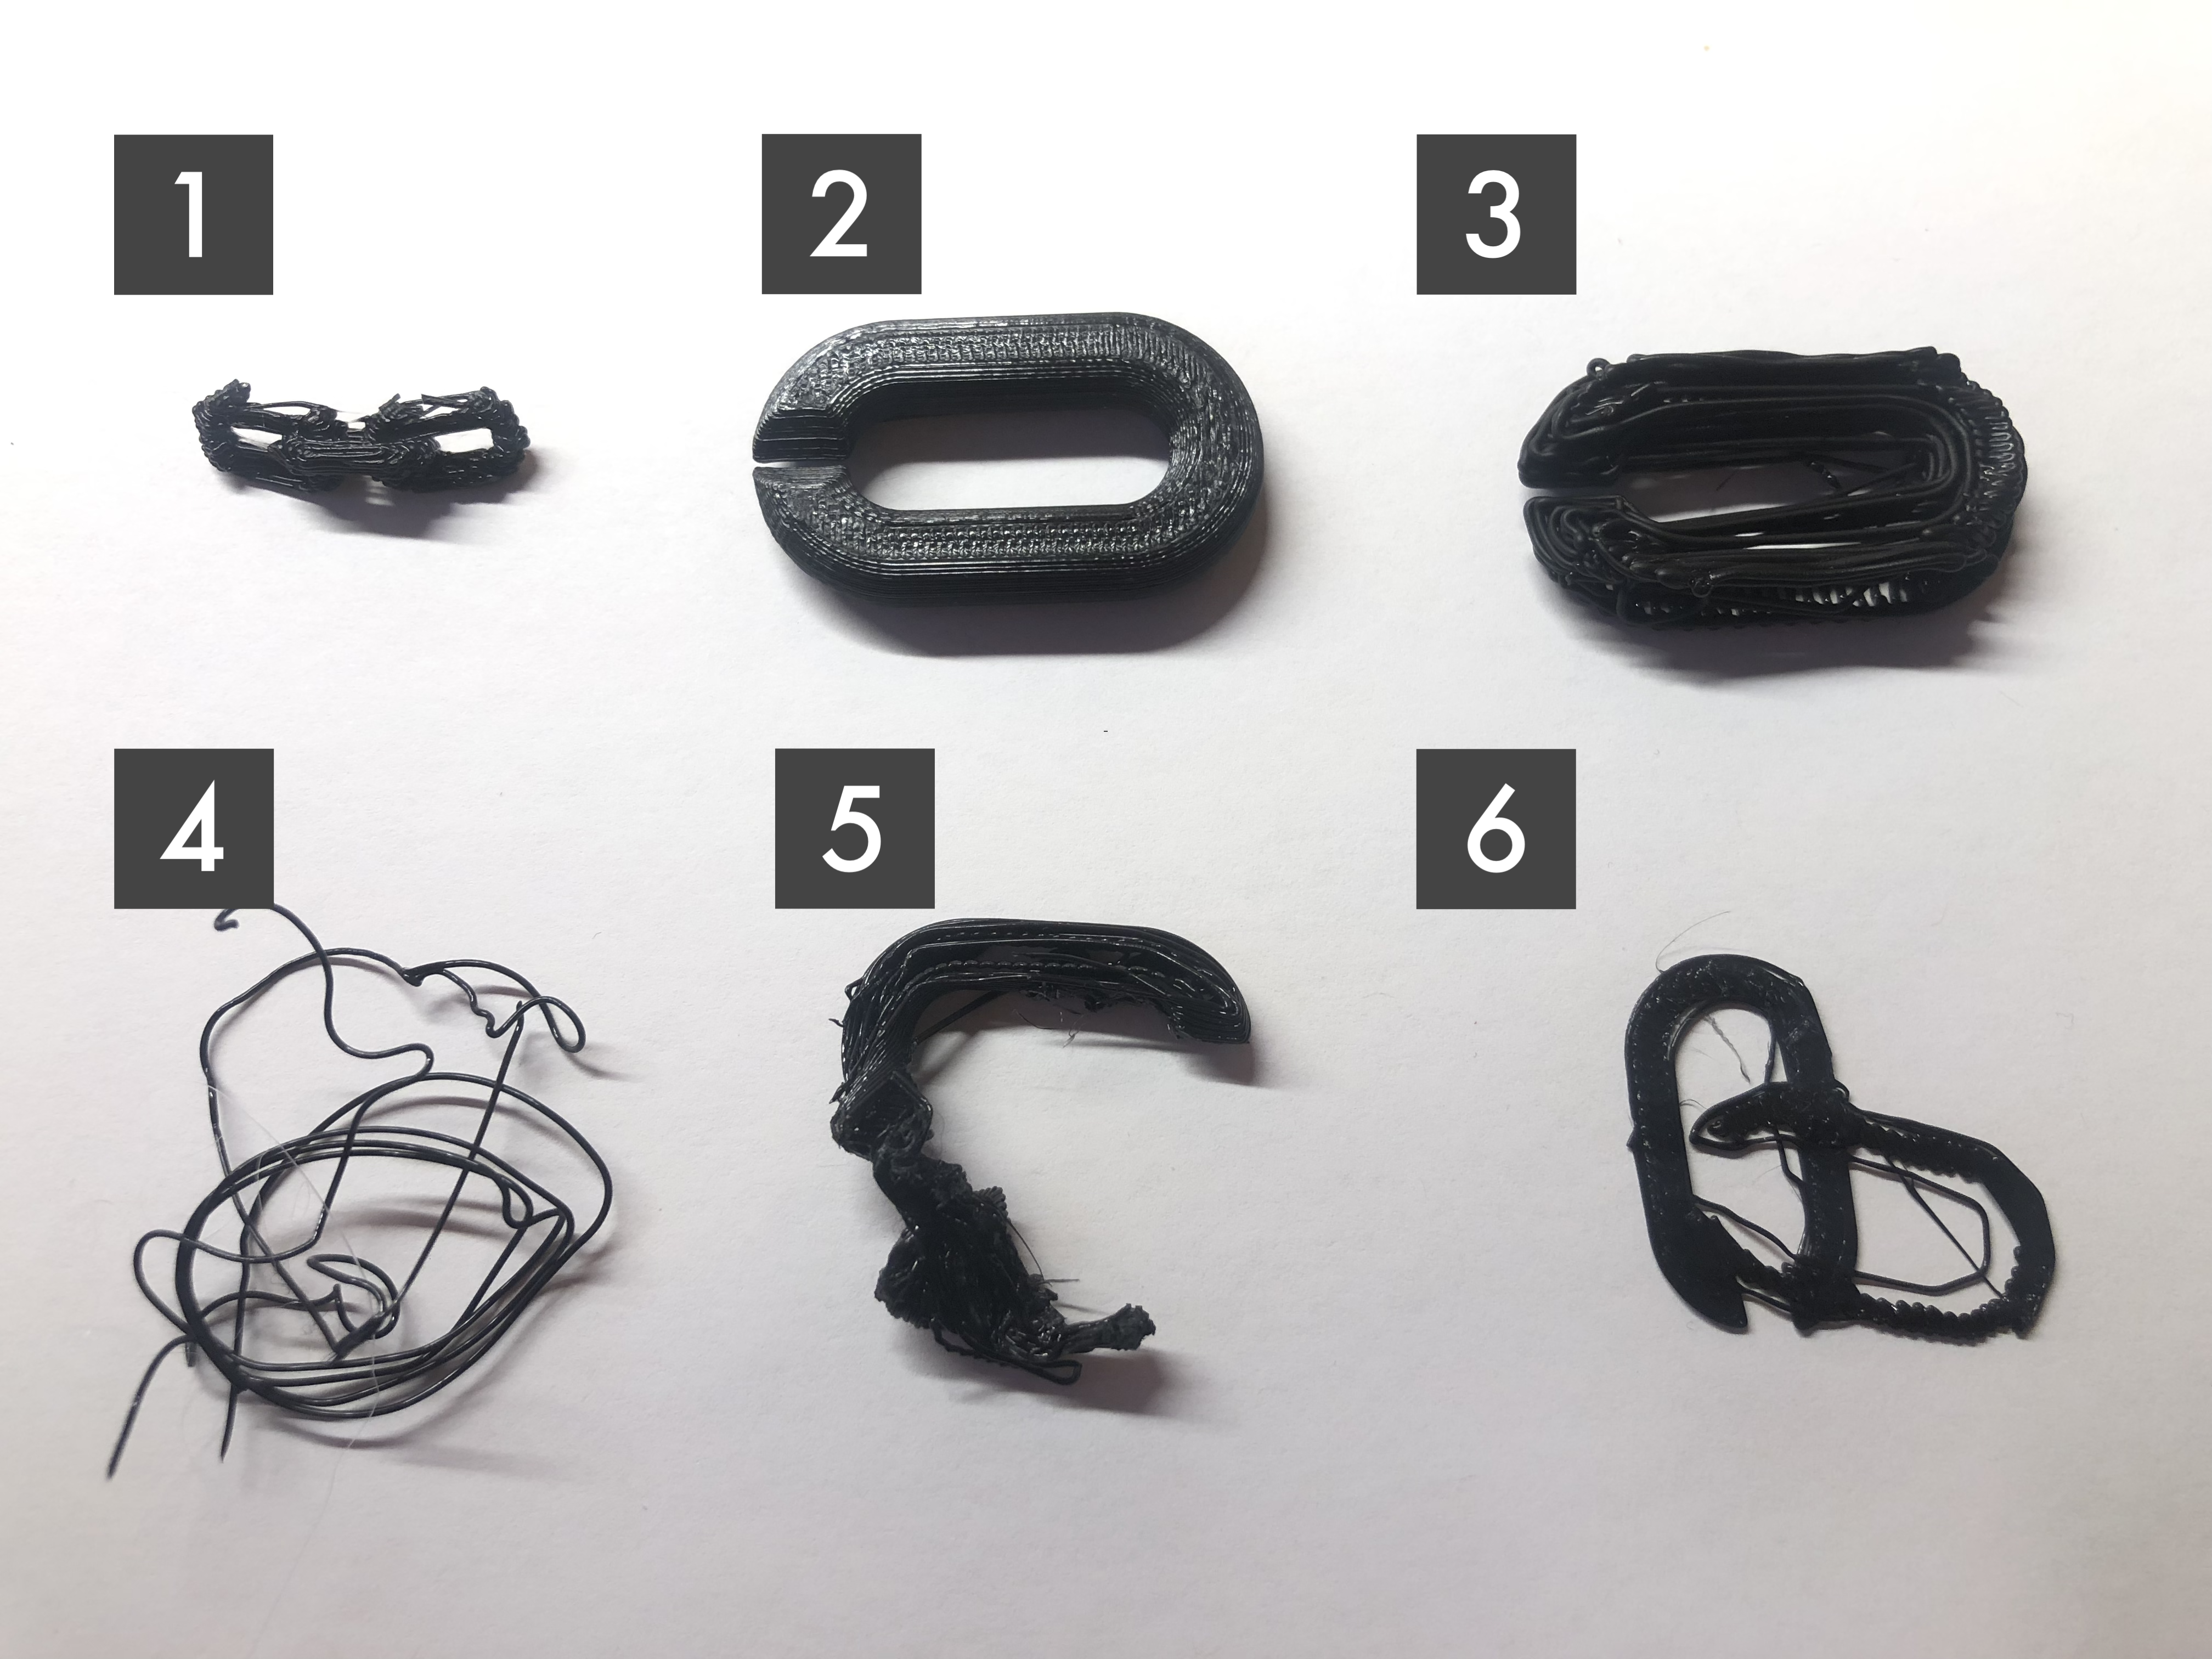
I was interested in printing out the chain as quickly as possible with as little material as possible. To this end, I went back online to find a simpler design. This modular design printed each link separately but featured a notch to connect the links together. I imported the .stl file into MakerBot Print and tested a number of different print settings with the Makerbot. As can be seen, most of them resulted in a failed print, but it was educational experience to see the vast number of unique failures that can occur. I underlined the changes I made to the settings with each iteration.
Print 2: Infill 0%, 0.25mm line width, standard Raft base. My first and best print. I quickly learned that infill had a big impact on print time, so I was happy that 0% infill was possible for this design.
Print 3: Infill 0%, 0.5mm line width, thin Raft base. The roof of the structure seemed to collapse into itself, likely as a result of both the combination of no infill and a thick extrusion.
Print 4: Infill 0%, 0.5mm line width, no base. I noticed that printing the first layer took a large chunk of time, so I decided to get rid of the base altogether. This is where I began to get some appreciation for print surface adhesion. Some Googling told me that z-axis calibration is important for first layer adhesion, but the MakerBot settings seemed a little difficult to fidget with so I left it alone and returned to printing with a Raft.
Print 5: Infill 0%, 0.25mm line width, thin Raft base, 180C extrusion temperature. The default print temperature was set at 215C, but the printer in Lowell had been having extruder overheating issues, so I wanted to see if I could print at a lower temperature. At some point during the print, the nozzle picked up the entire print and started moving with it. I imagine that perhaps the lower temperature affected the extrusion quality.
Print 6: Infill 0%, 0.25mm line width, thin Raft base, 200C extrusion temperature, 80% scale. I incremented the temperature up, but the model still ended up detaching from the base at some point. I also made the model smaller, so even with rafts, I guess the surface available to adhere was smaller.
At the end of my evening of limit testing the Replicator+, I felt more confident with setting my own settings with slicing software and understanding why certain print components are necessary. At some point, I also figured out how to load and unload the filament in the 3D printer.
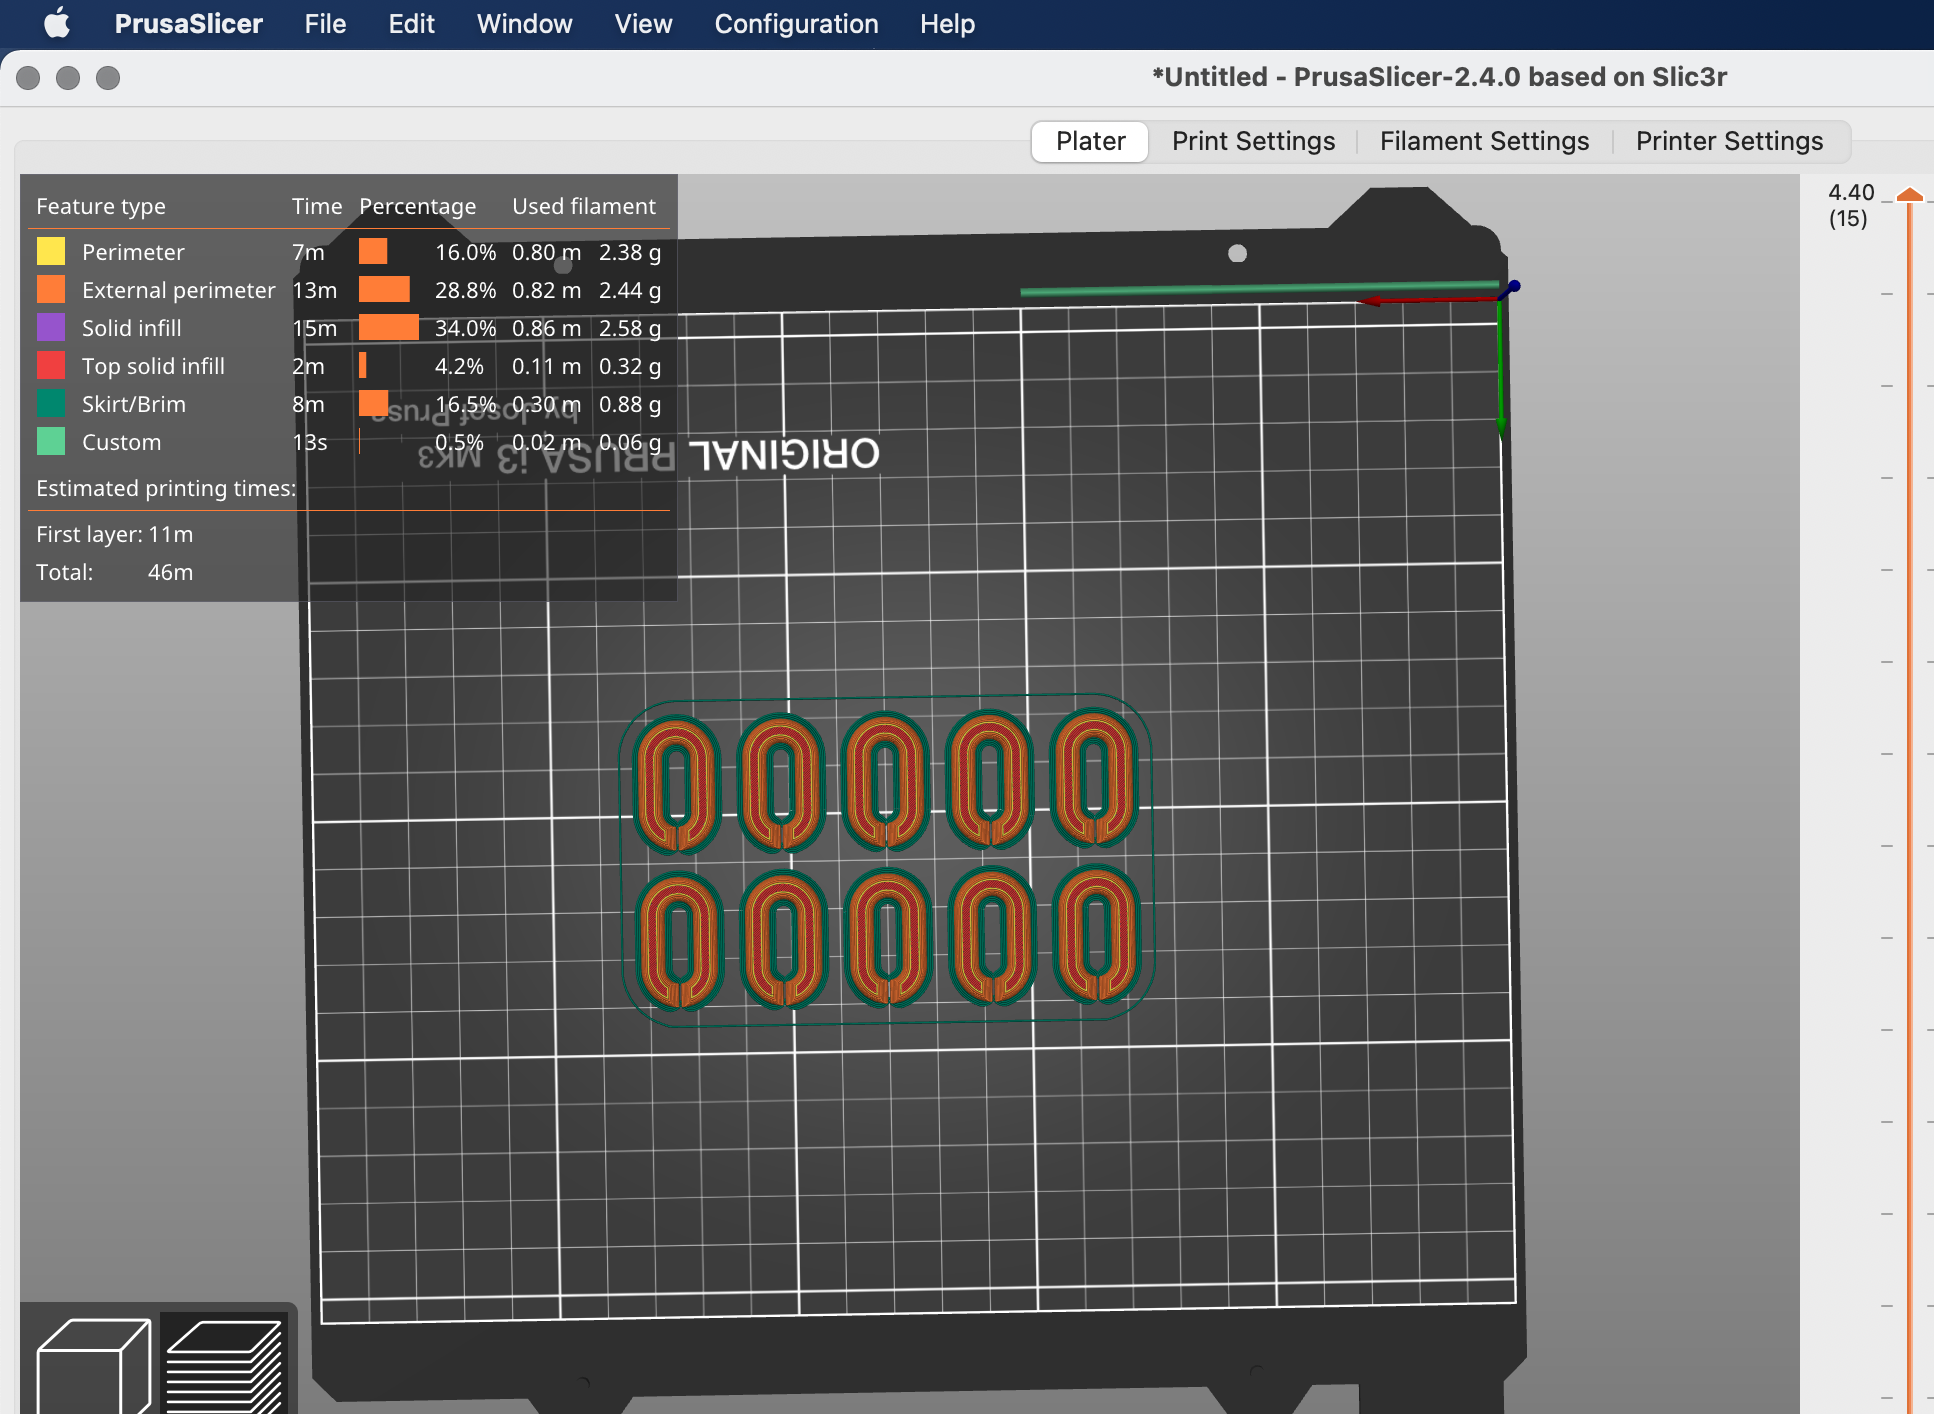
Satisfied with my optimization of print settings, I came to the Science Center Makerspace to make sure of the Prusa printers. I laid out 10 links as shown above with 0% infill, default brim+skirt, and 0.3 mm line width.
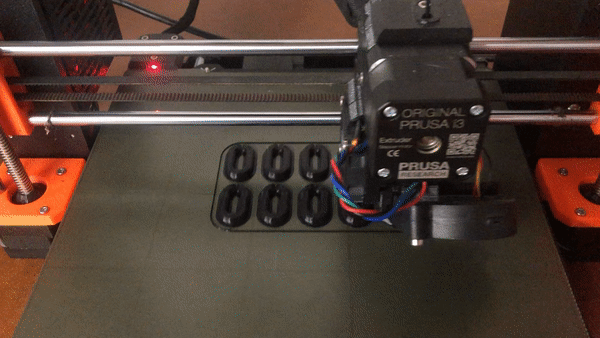
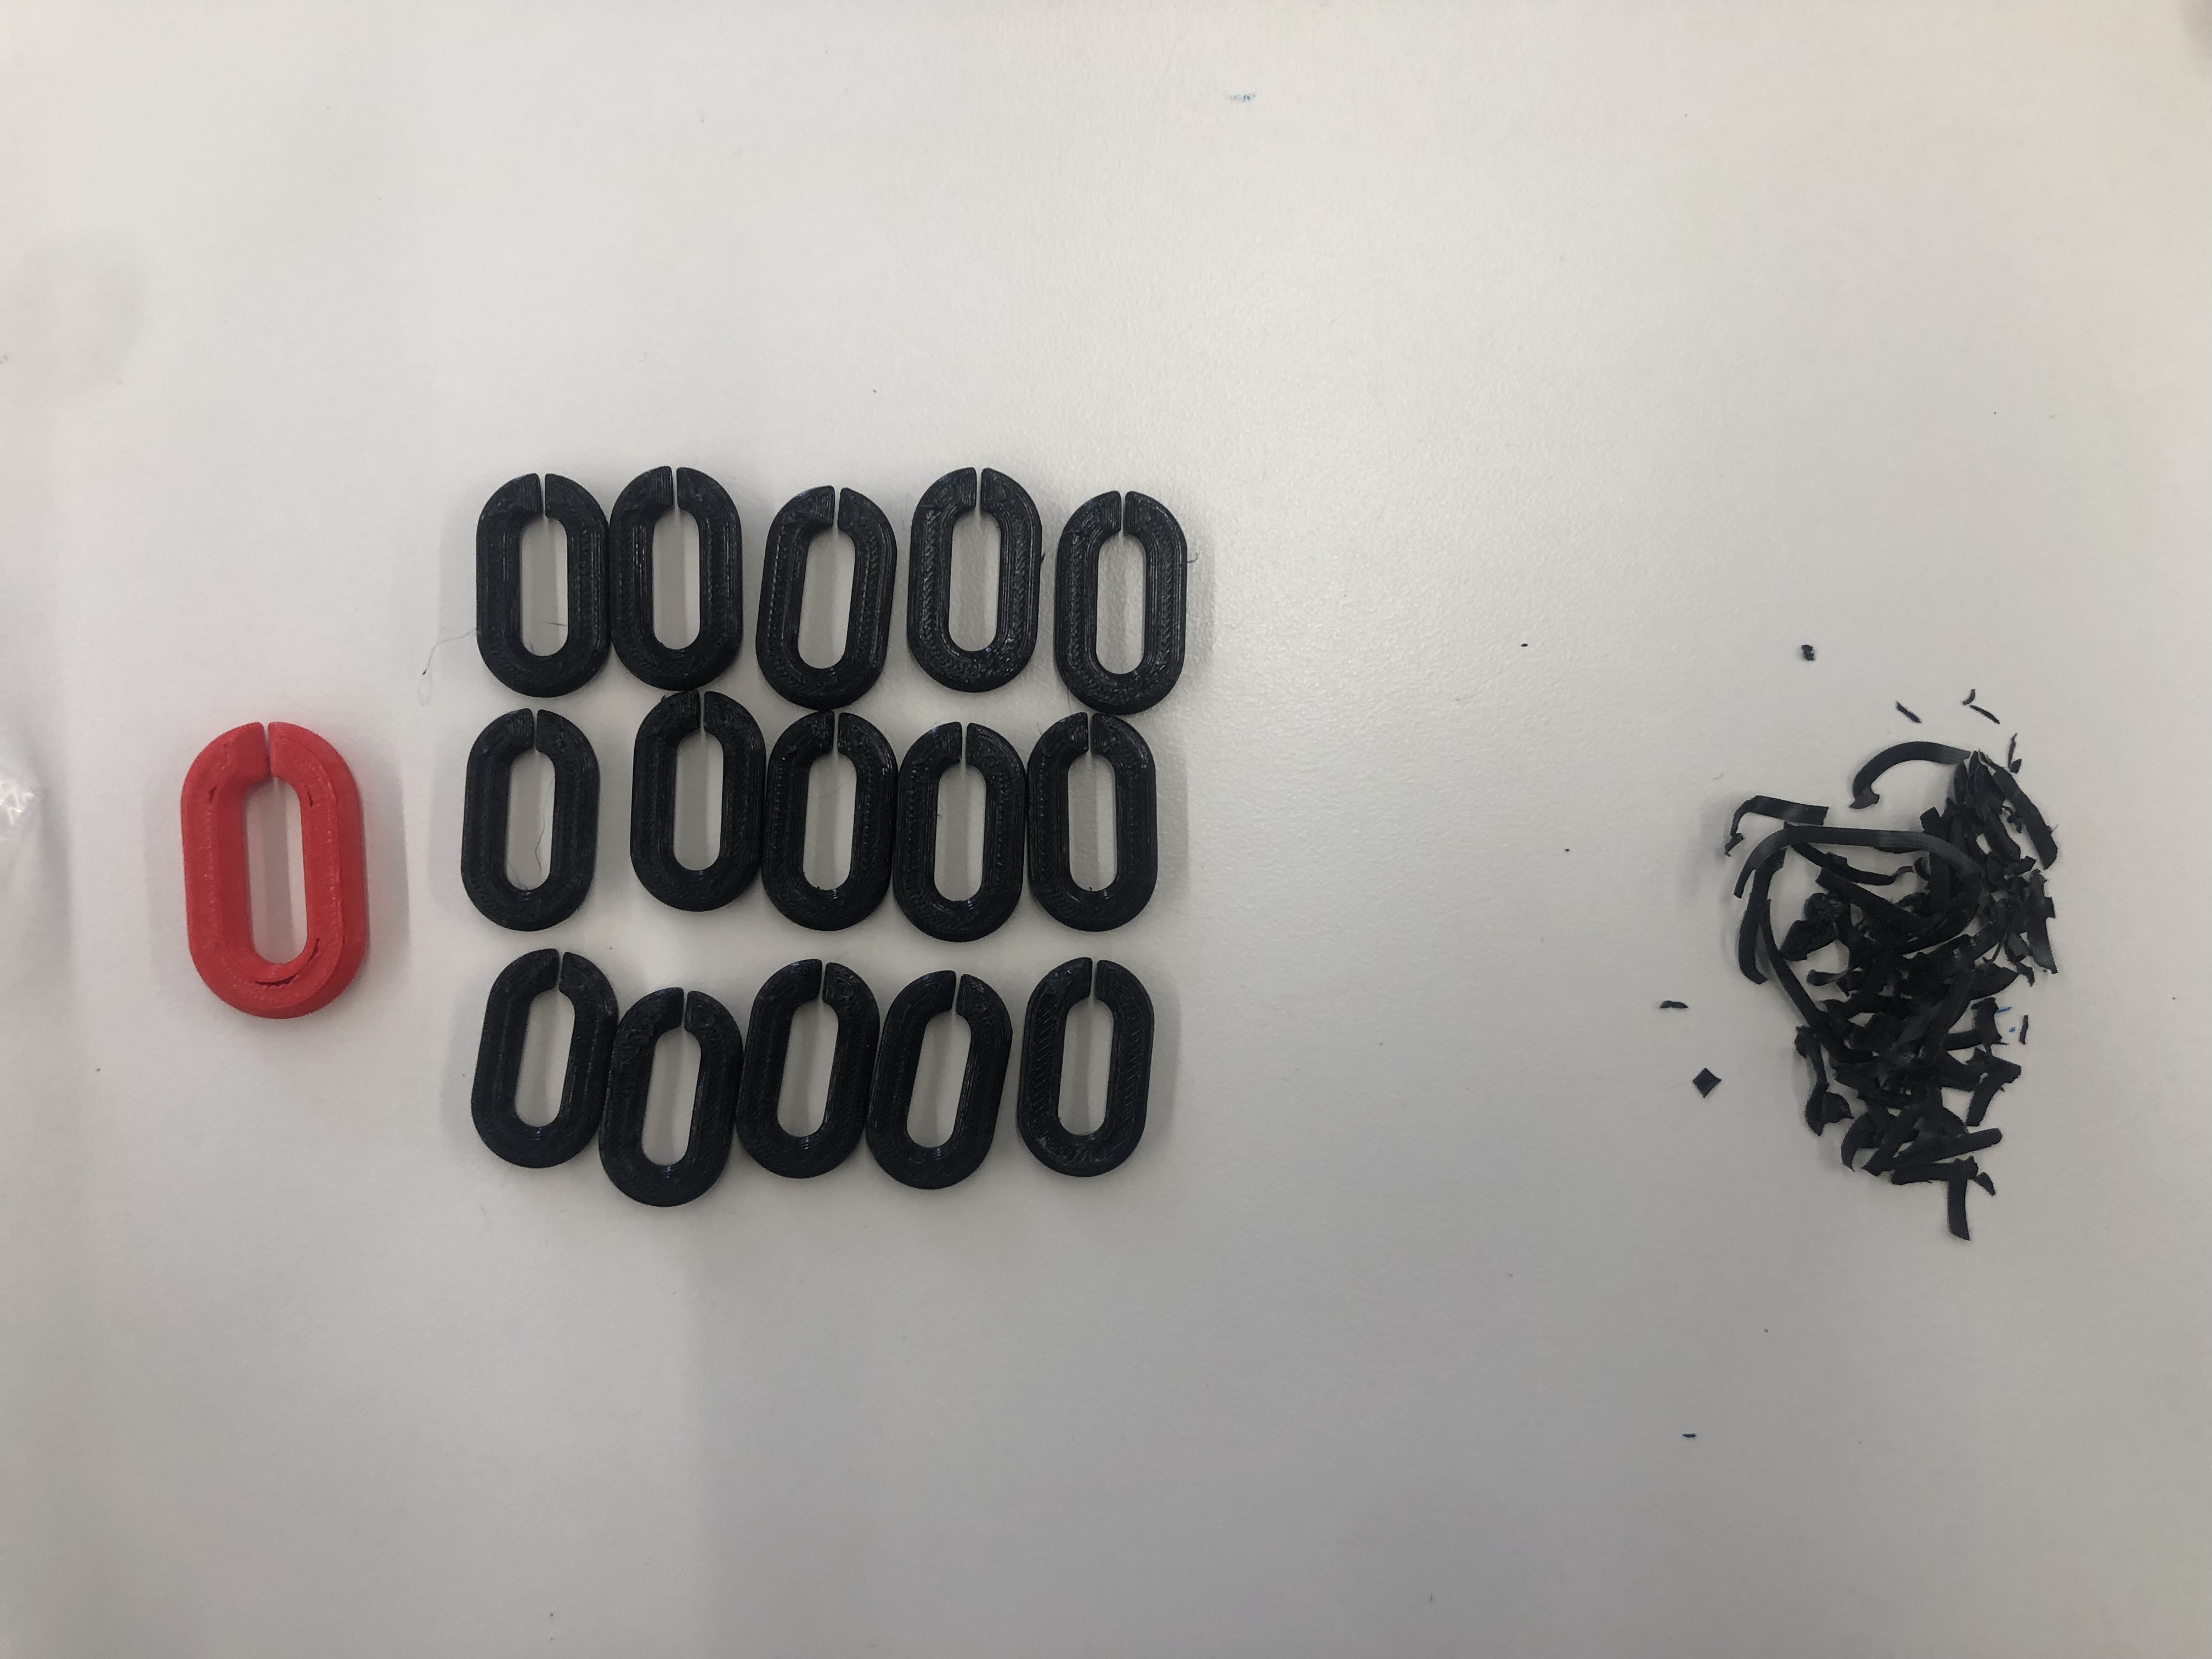
I repeated the print twice and removed the brims with a pair of pliers, leaving my chain links ready for final assembly.
Bronchial Tree
The second half of my project concerned the bronchial tree. I found a free-to-use model courtesy of a creator on Sketchfab (shown below).
The model downloaded in a .3ds format, which I learned my slicing software cannot process, so I used an online applet to convert the model into the familiar .stl format. Due to the intricate branches of the model, I knew it would be a challenge to build the supports for my model. Nathan suggested using a dissolvable filament for the supports using the dual extrusion FlashForge 3D printer.
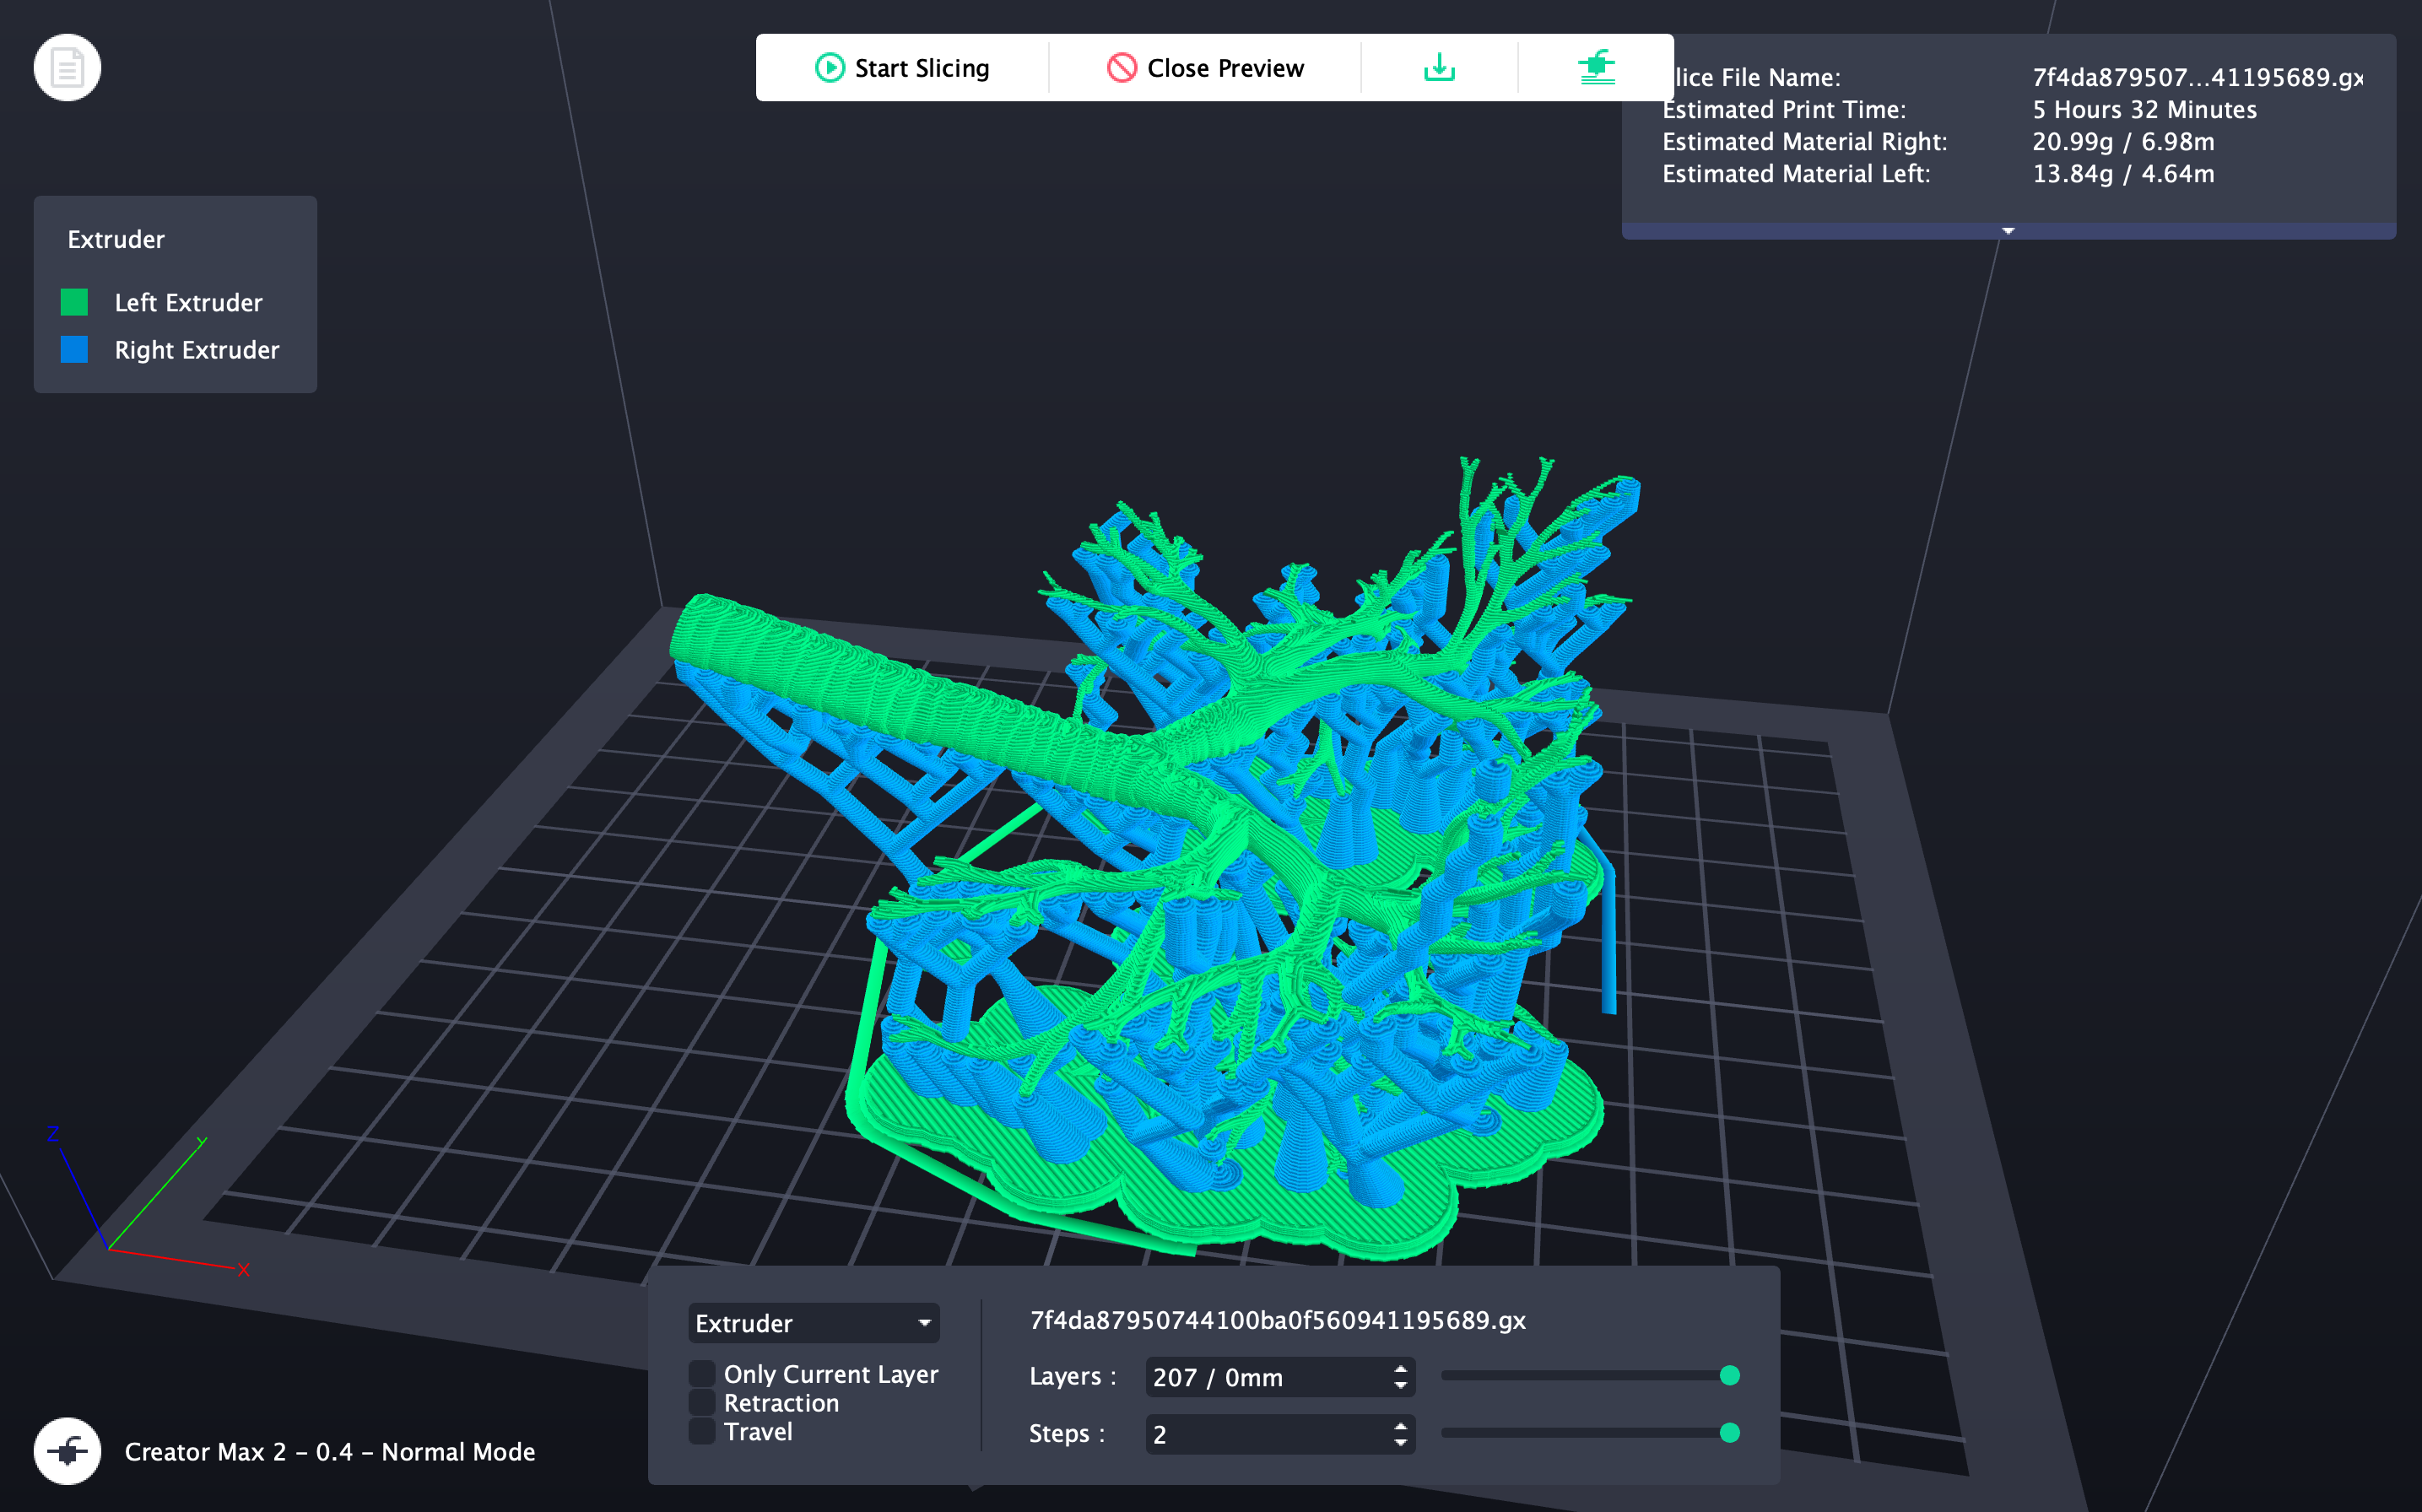
Excited to try a new machine, I downloaded the FlashForge slicing software and watched a couple tutorials to learn how to set the extrusion settings. The software had a material-saving support generator called "tree" supports, which looked much more efficient than the traditional column supports. I was able to figure out how to set the supports to print with one filament and the model itself to print with another filament as shown above.
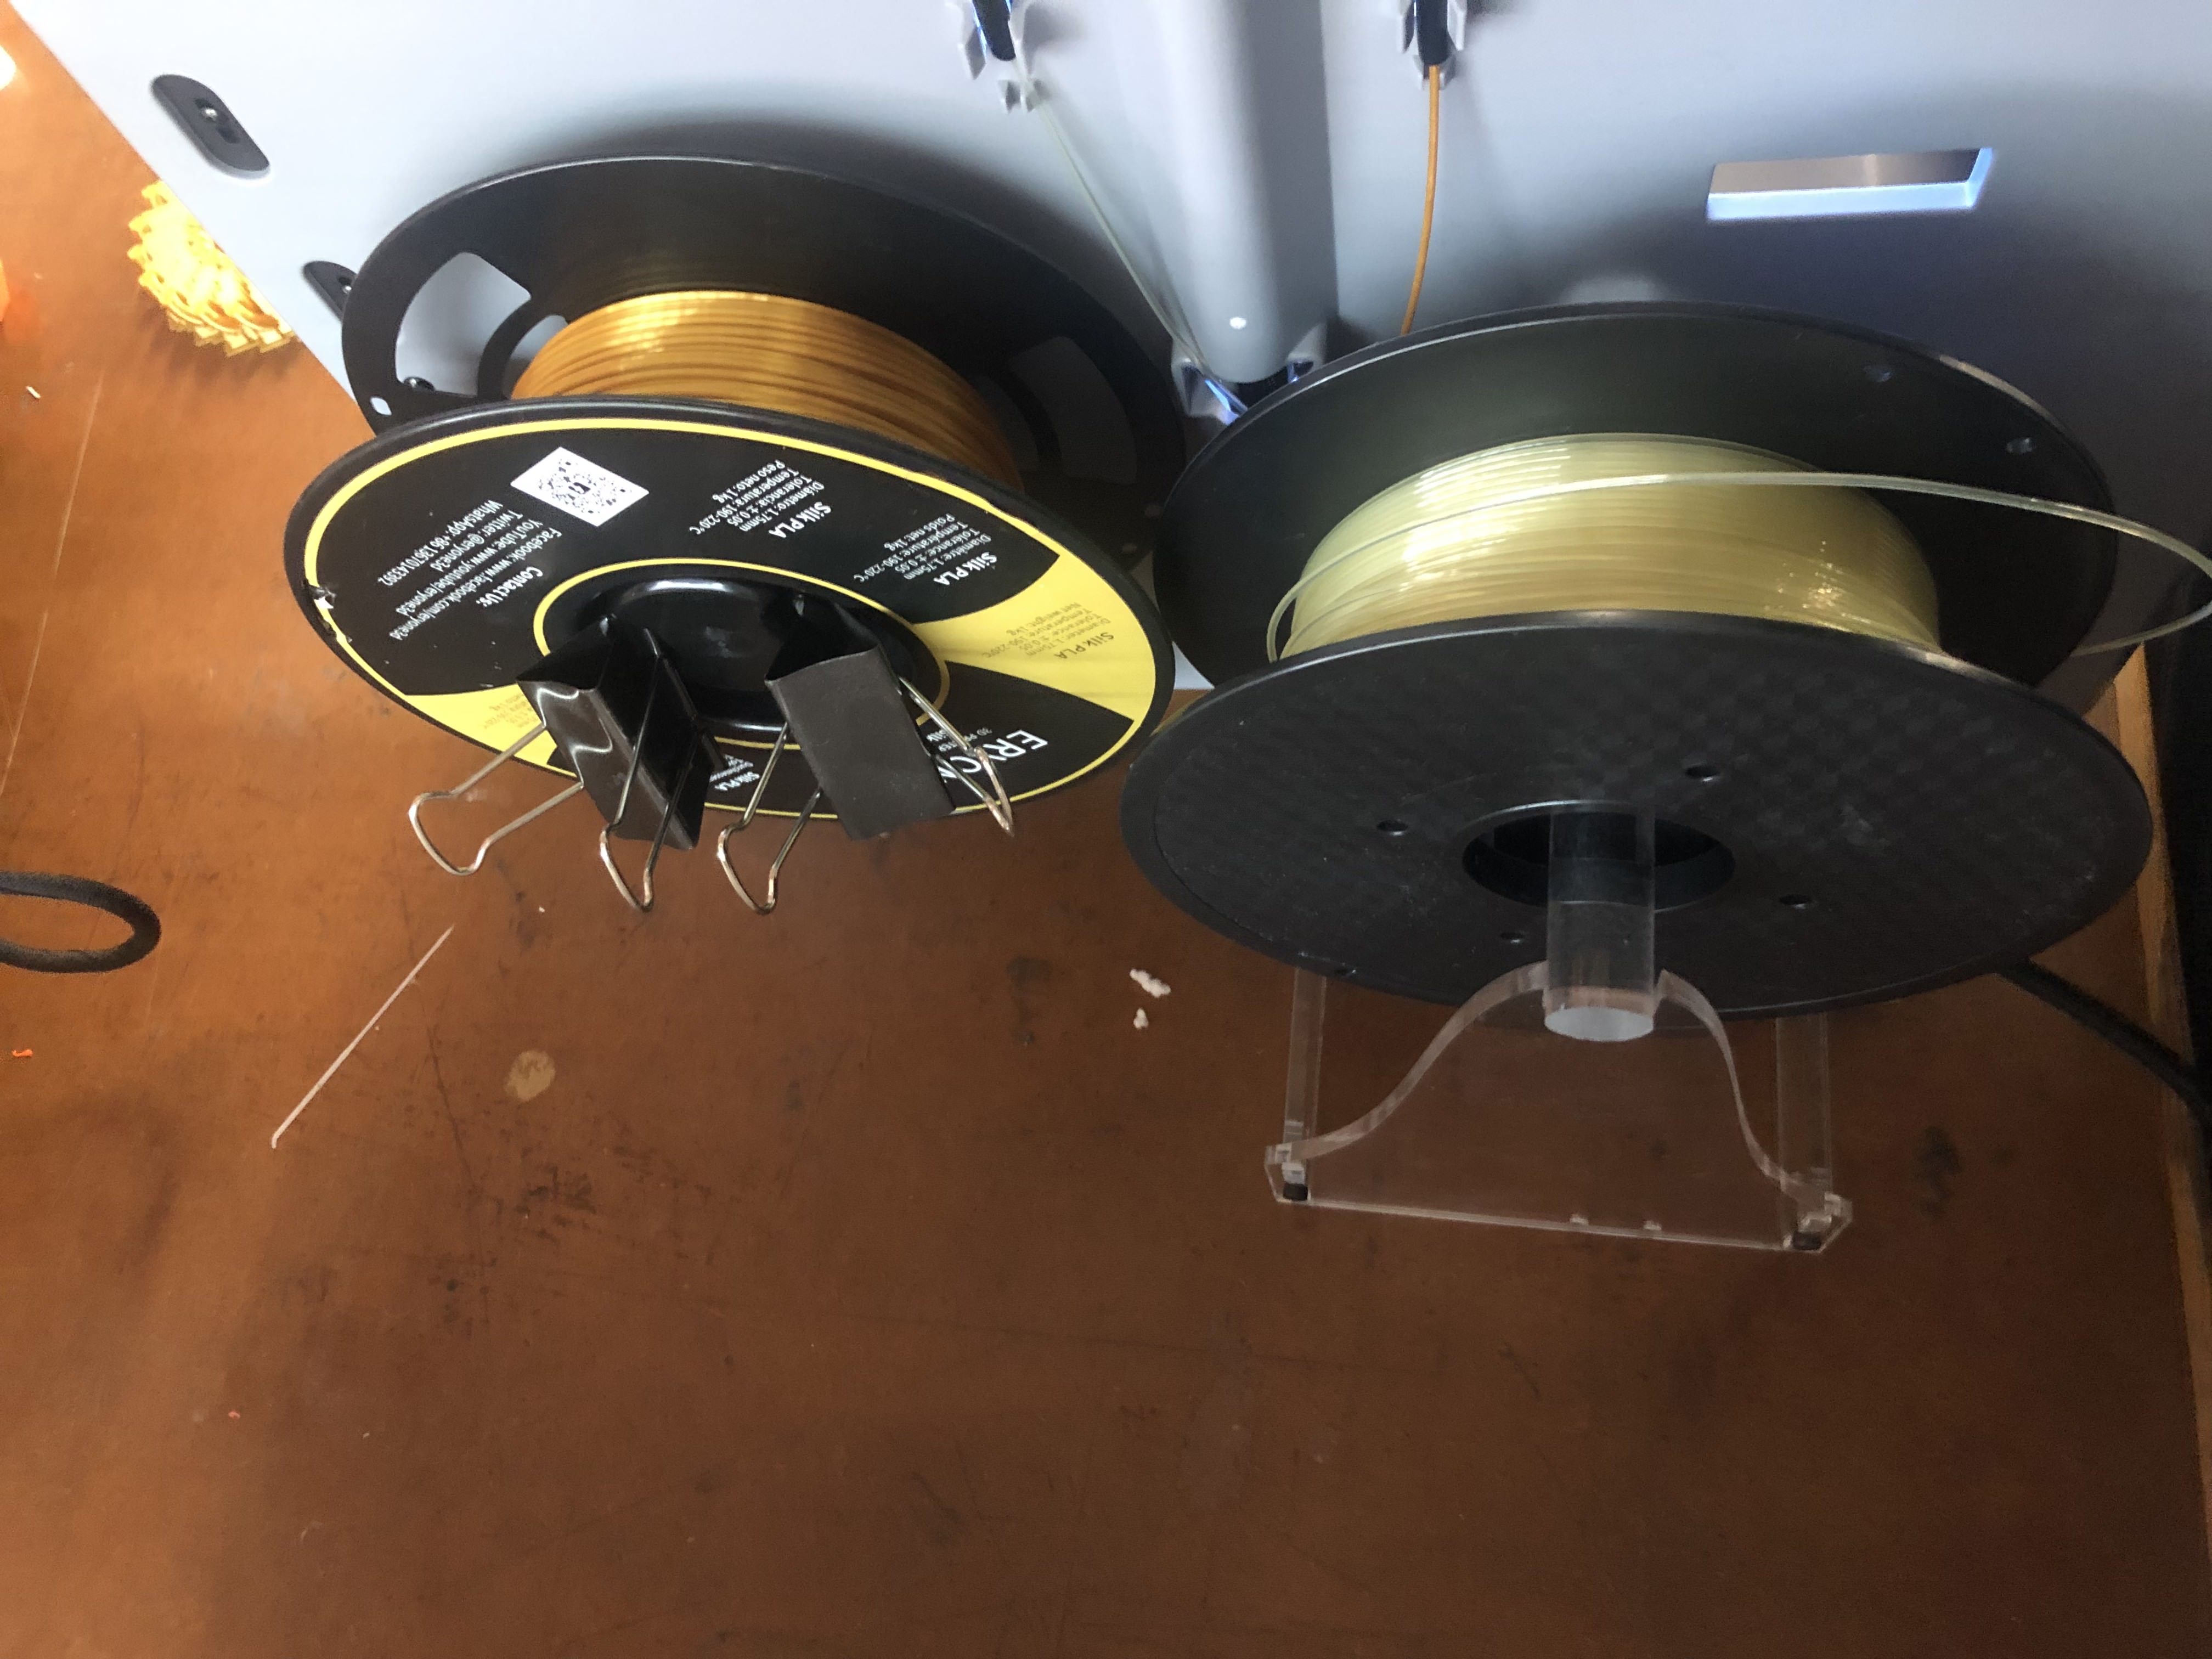
Neither the dissolvable PVA filament and the gold-colored PLA filament were standard to the FlashForge printer, so it did not rack properly onto the back of the printer. Ibrahim and I scavenged some materials from around the lab to engineer a solution so the filaments stayed upright and untangled for the duration of the print.
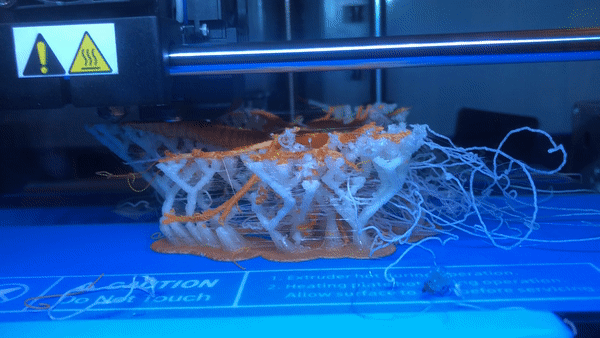
It was super interesting to see the dual extruder at work. The 2 extruders takes turn working on each layer, so it does make for a longer print time. For a ballpark reference, my print was smaller than my palm and it took 5 hours. I noticed that the gold filament was printing well but that the dissolvable PVA filament was stringing as visible in the .gif above. I imagined that some adjustments to the filament temperature (I used the default 215C) or extrusion diameter might make be useful in future projects.
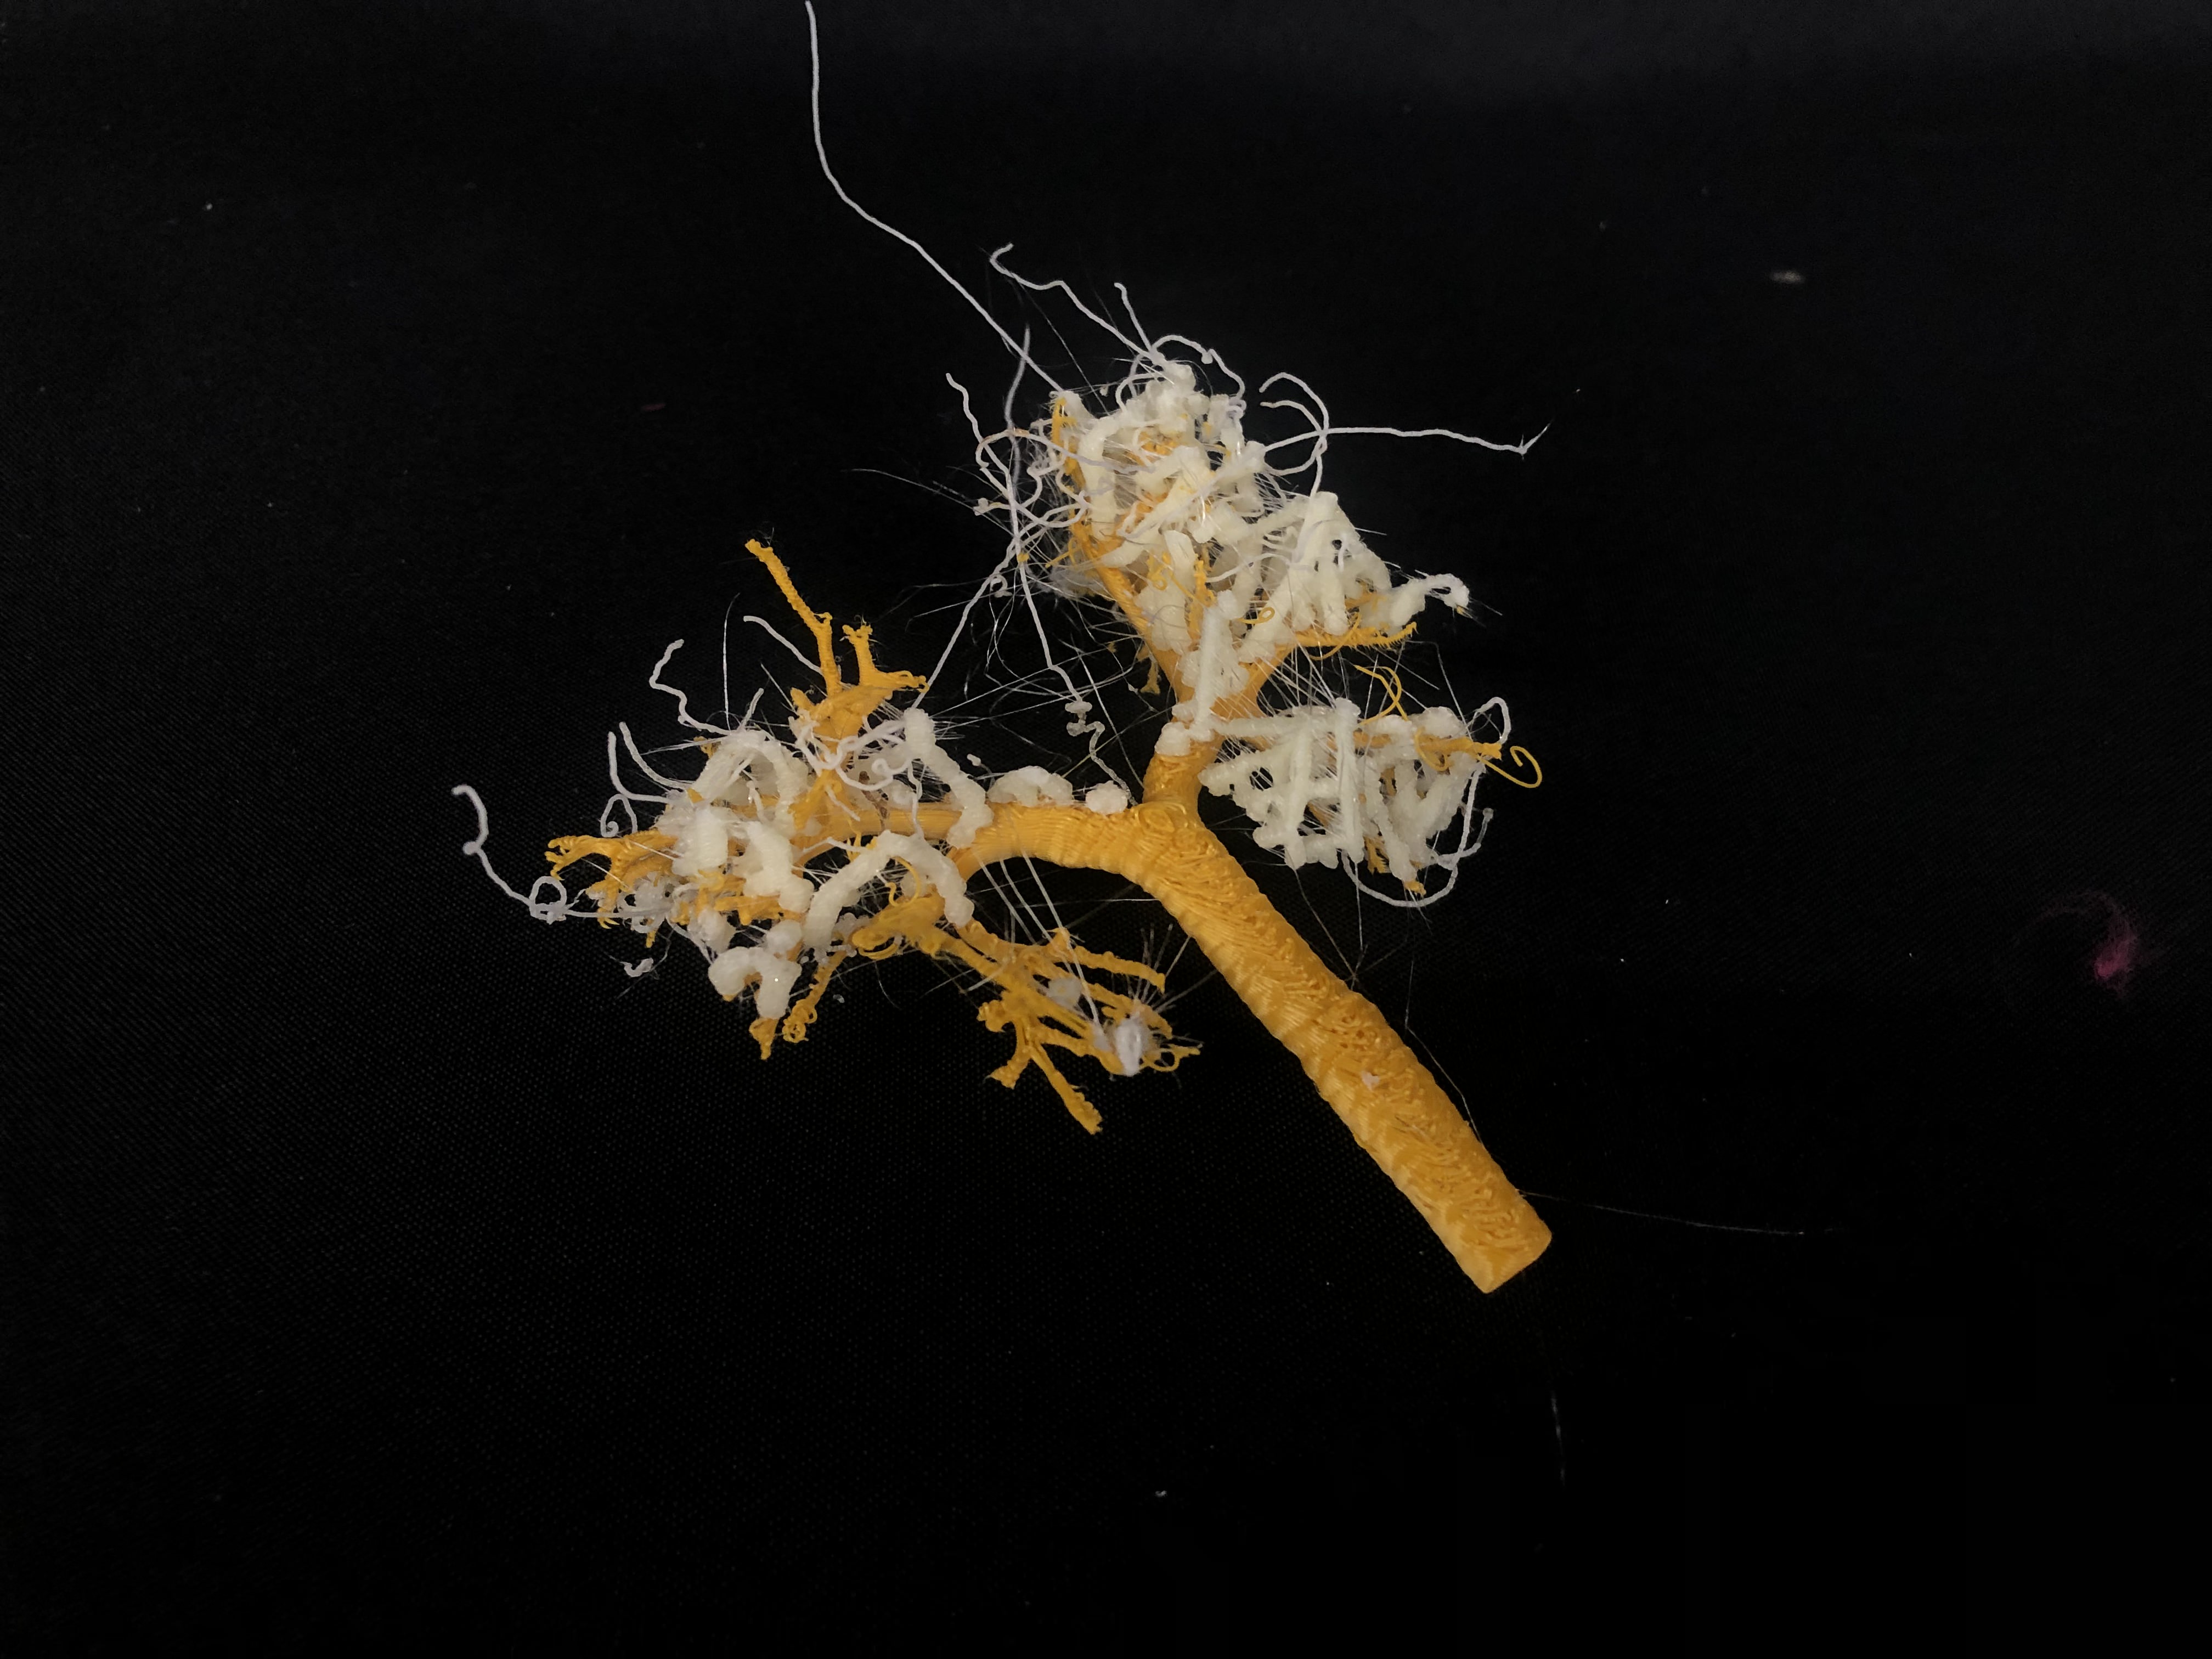
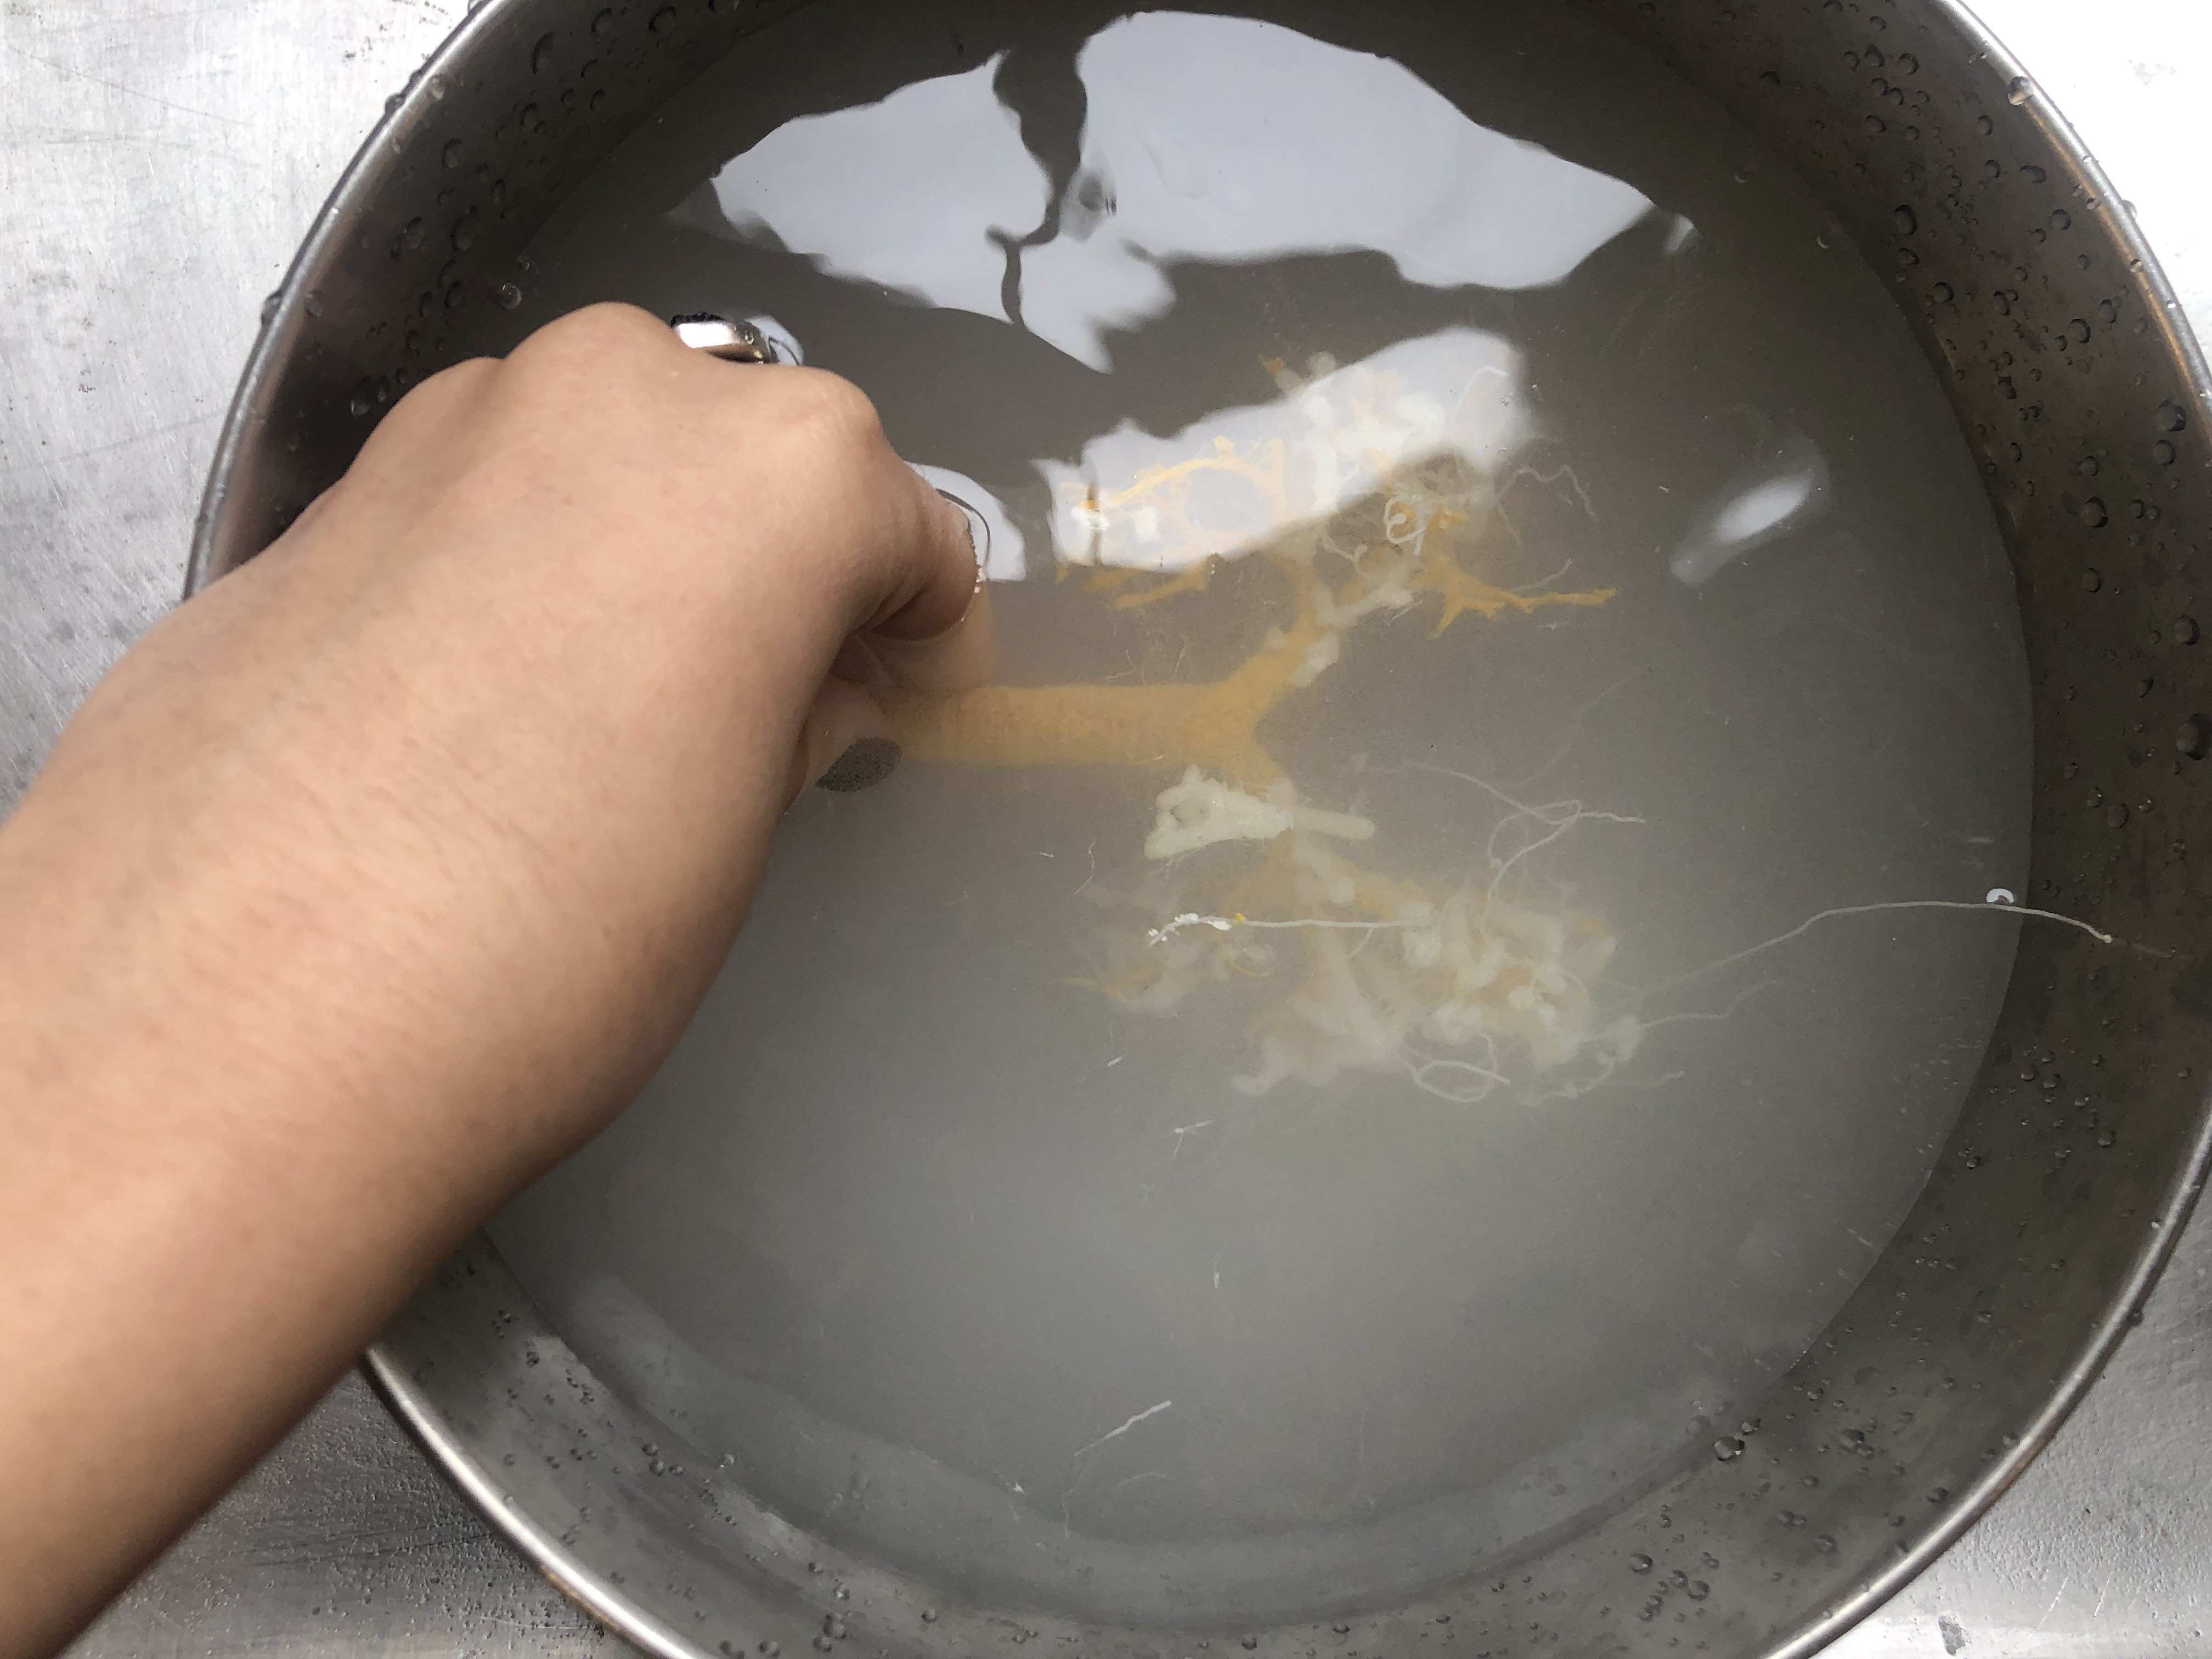
Regardless of the stringing of the supprot filament, the print completed successfully. I dislodged the print and submerged the piece in room temperature and agitated my piece. The support filament quickly softened and began to flake off my model. Within 15 minutes, I had the support filament fully removed.
Assembly & Final Product
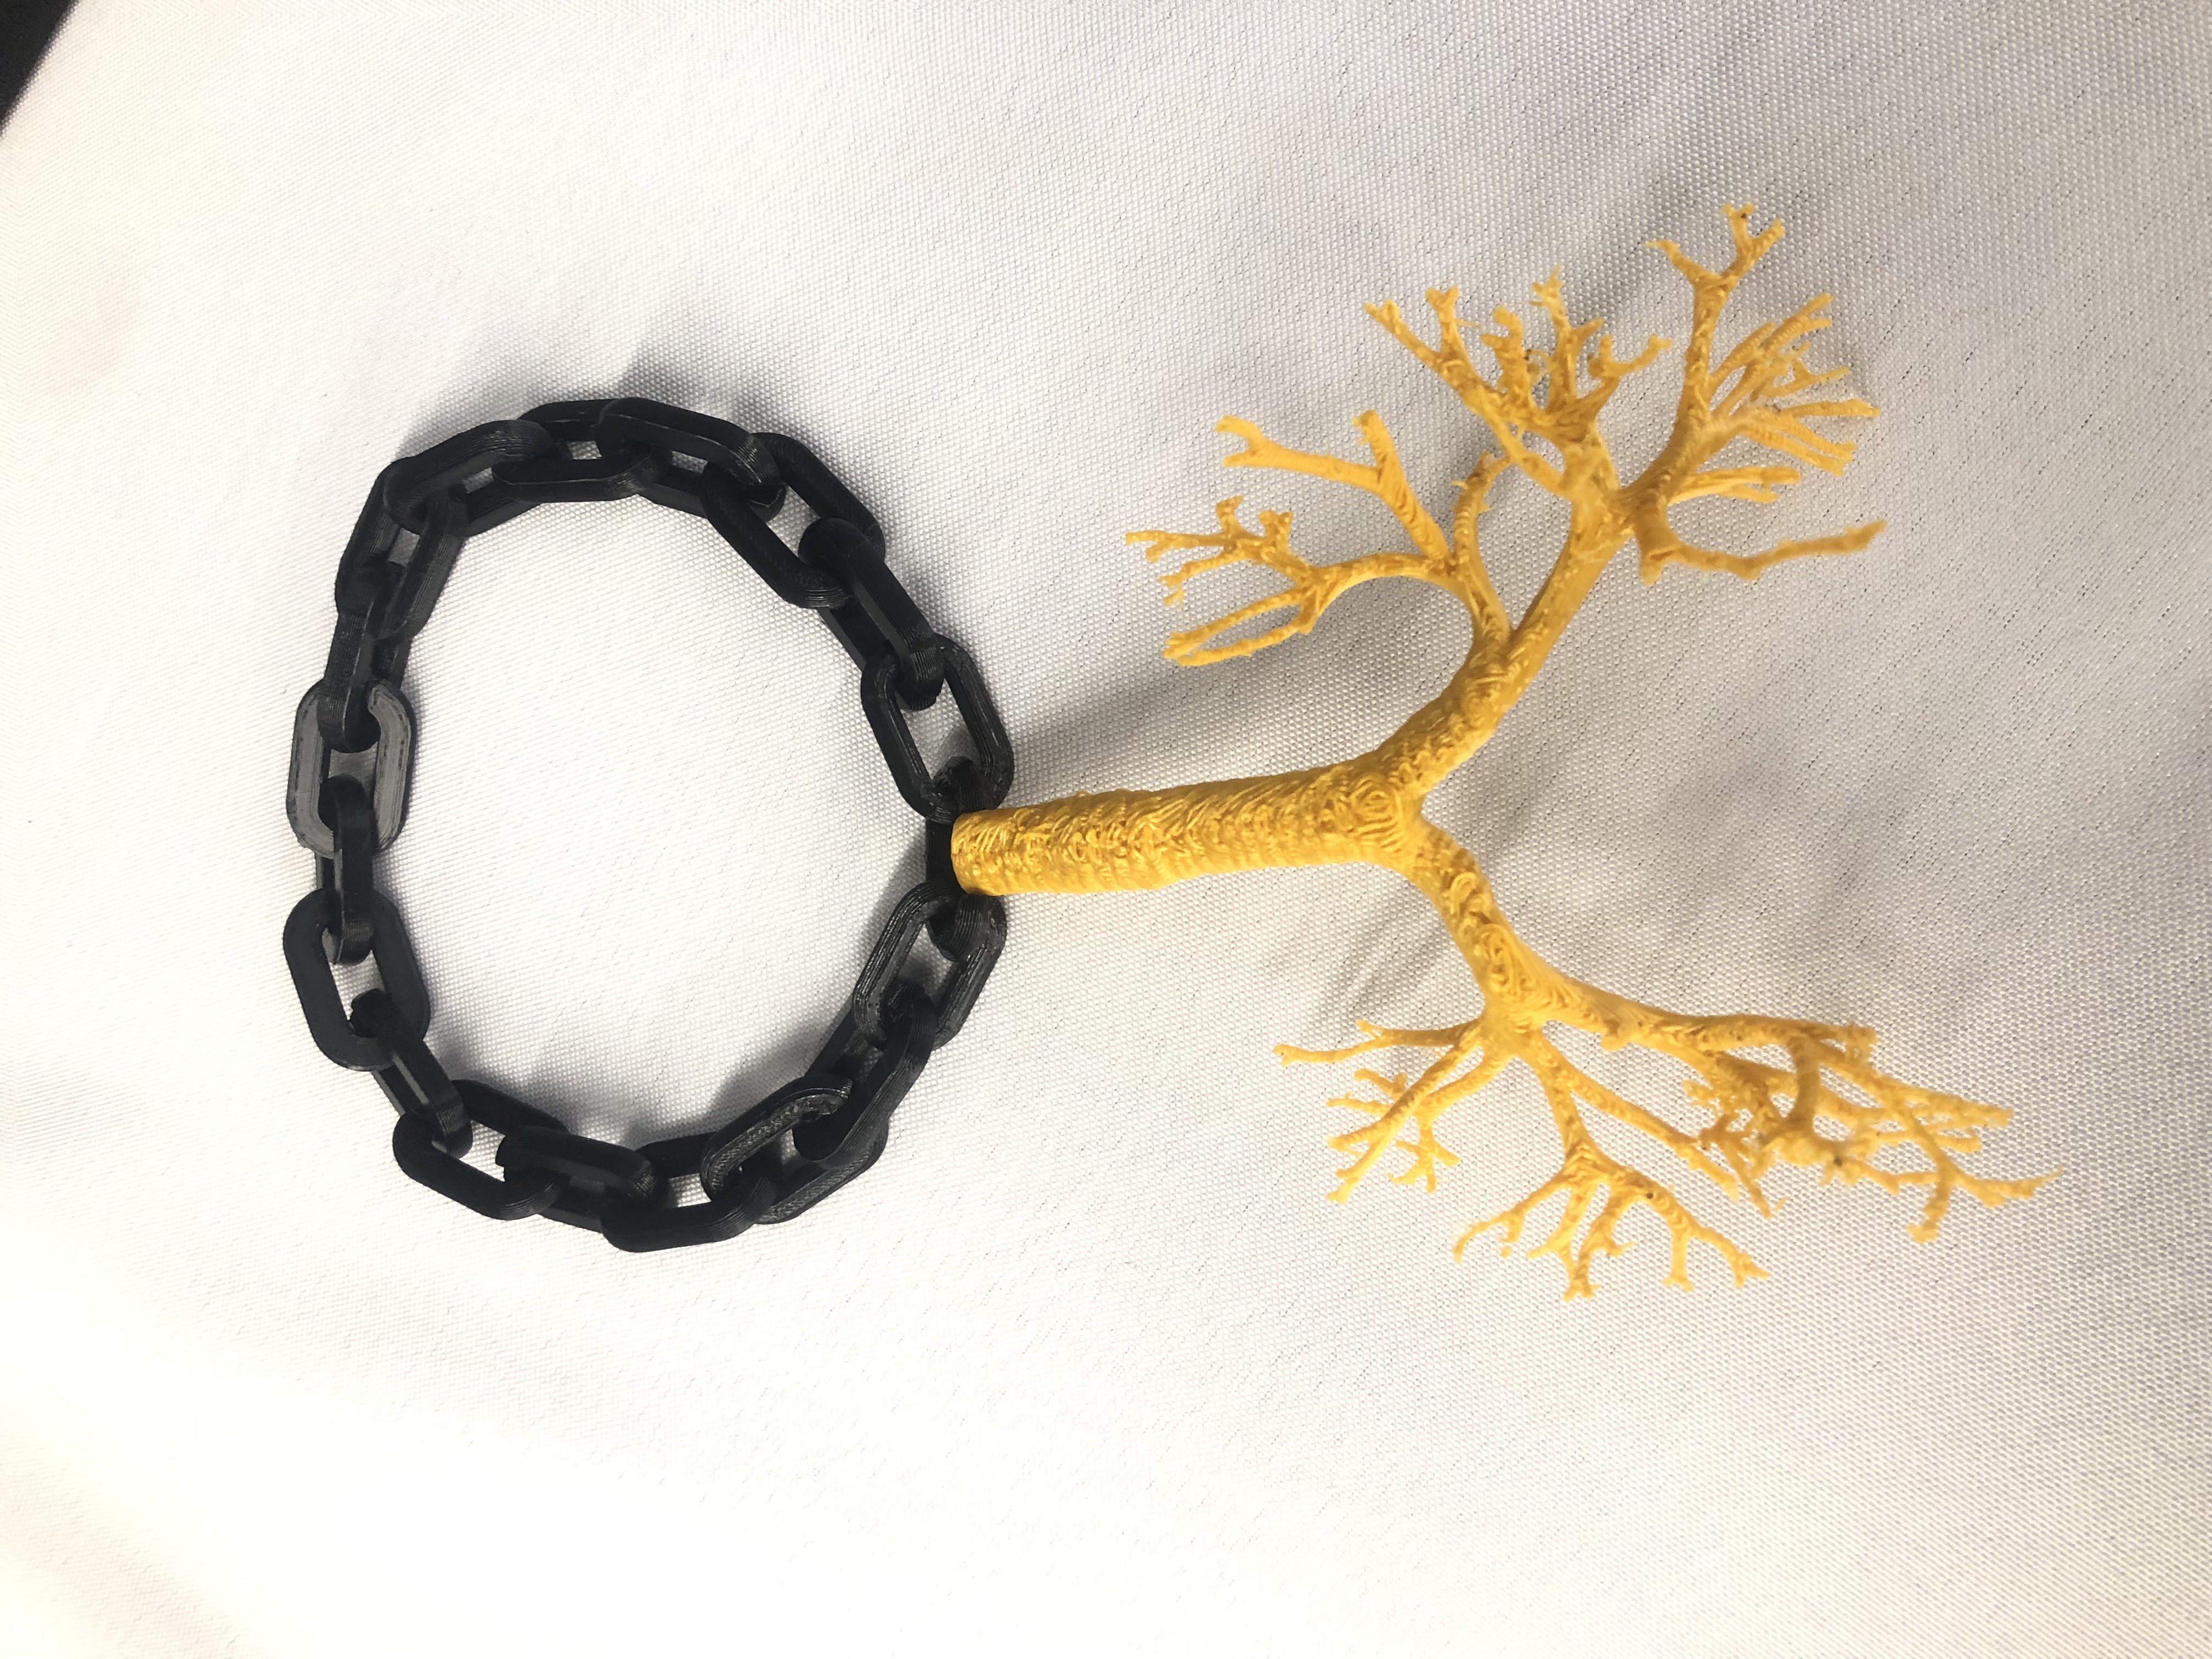
The chain links slotted together very well. The 0% fill actually gave the pieces some nice bend. I clipped the side of one of the links and fitted the end of the bronchial tree in. Because I did not design a clasp mechanism, I chose not to glue it down but the assembly was able to held itself together regardless.
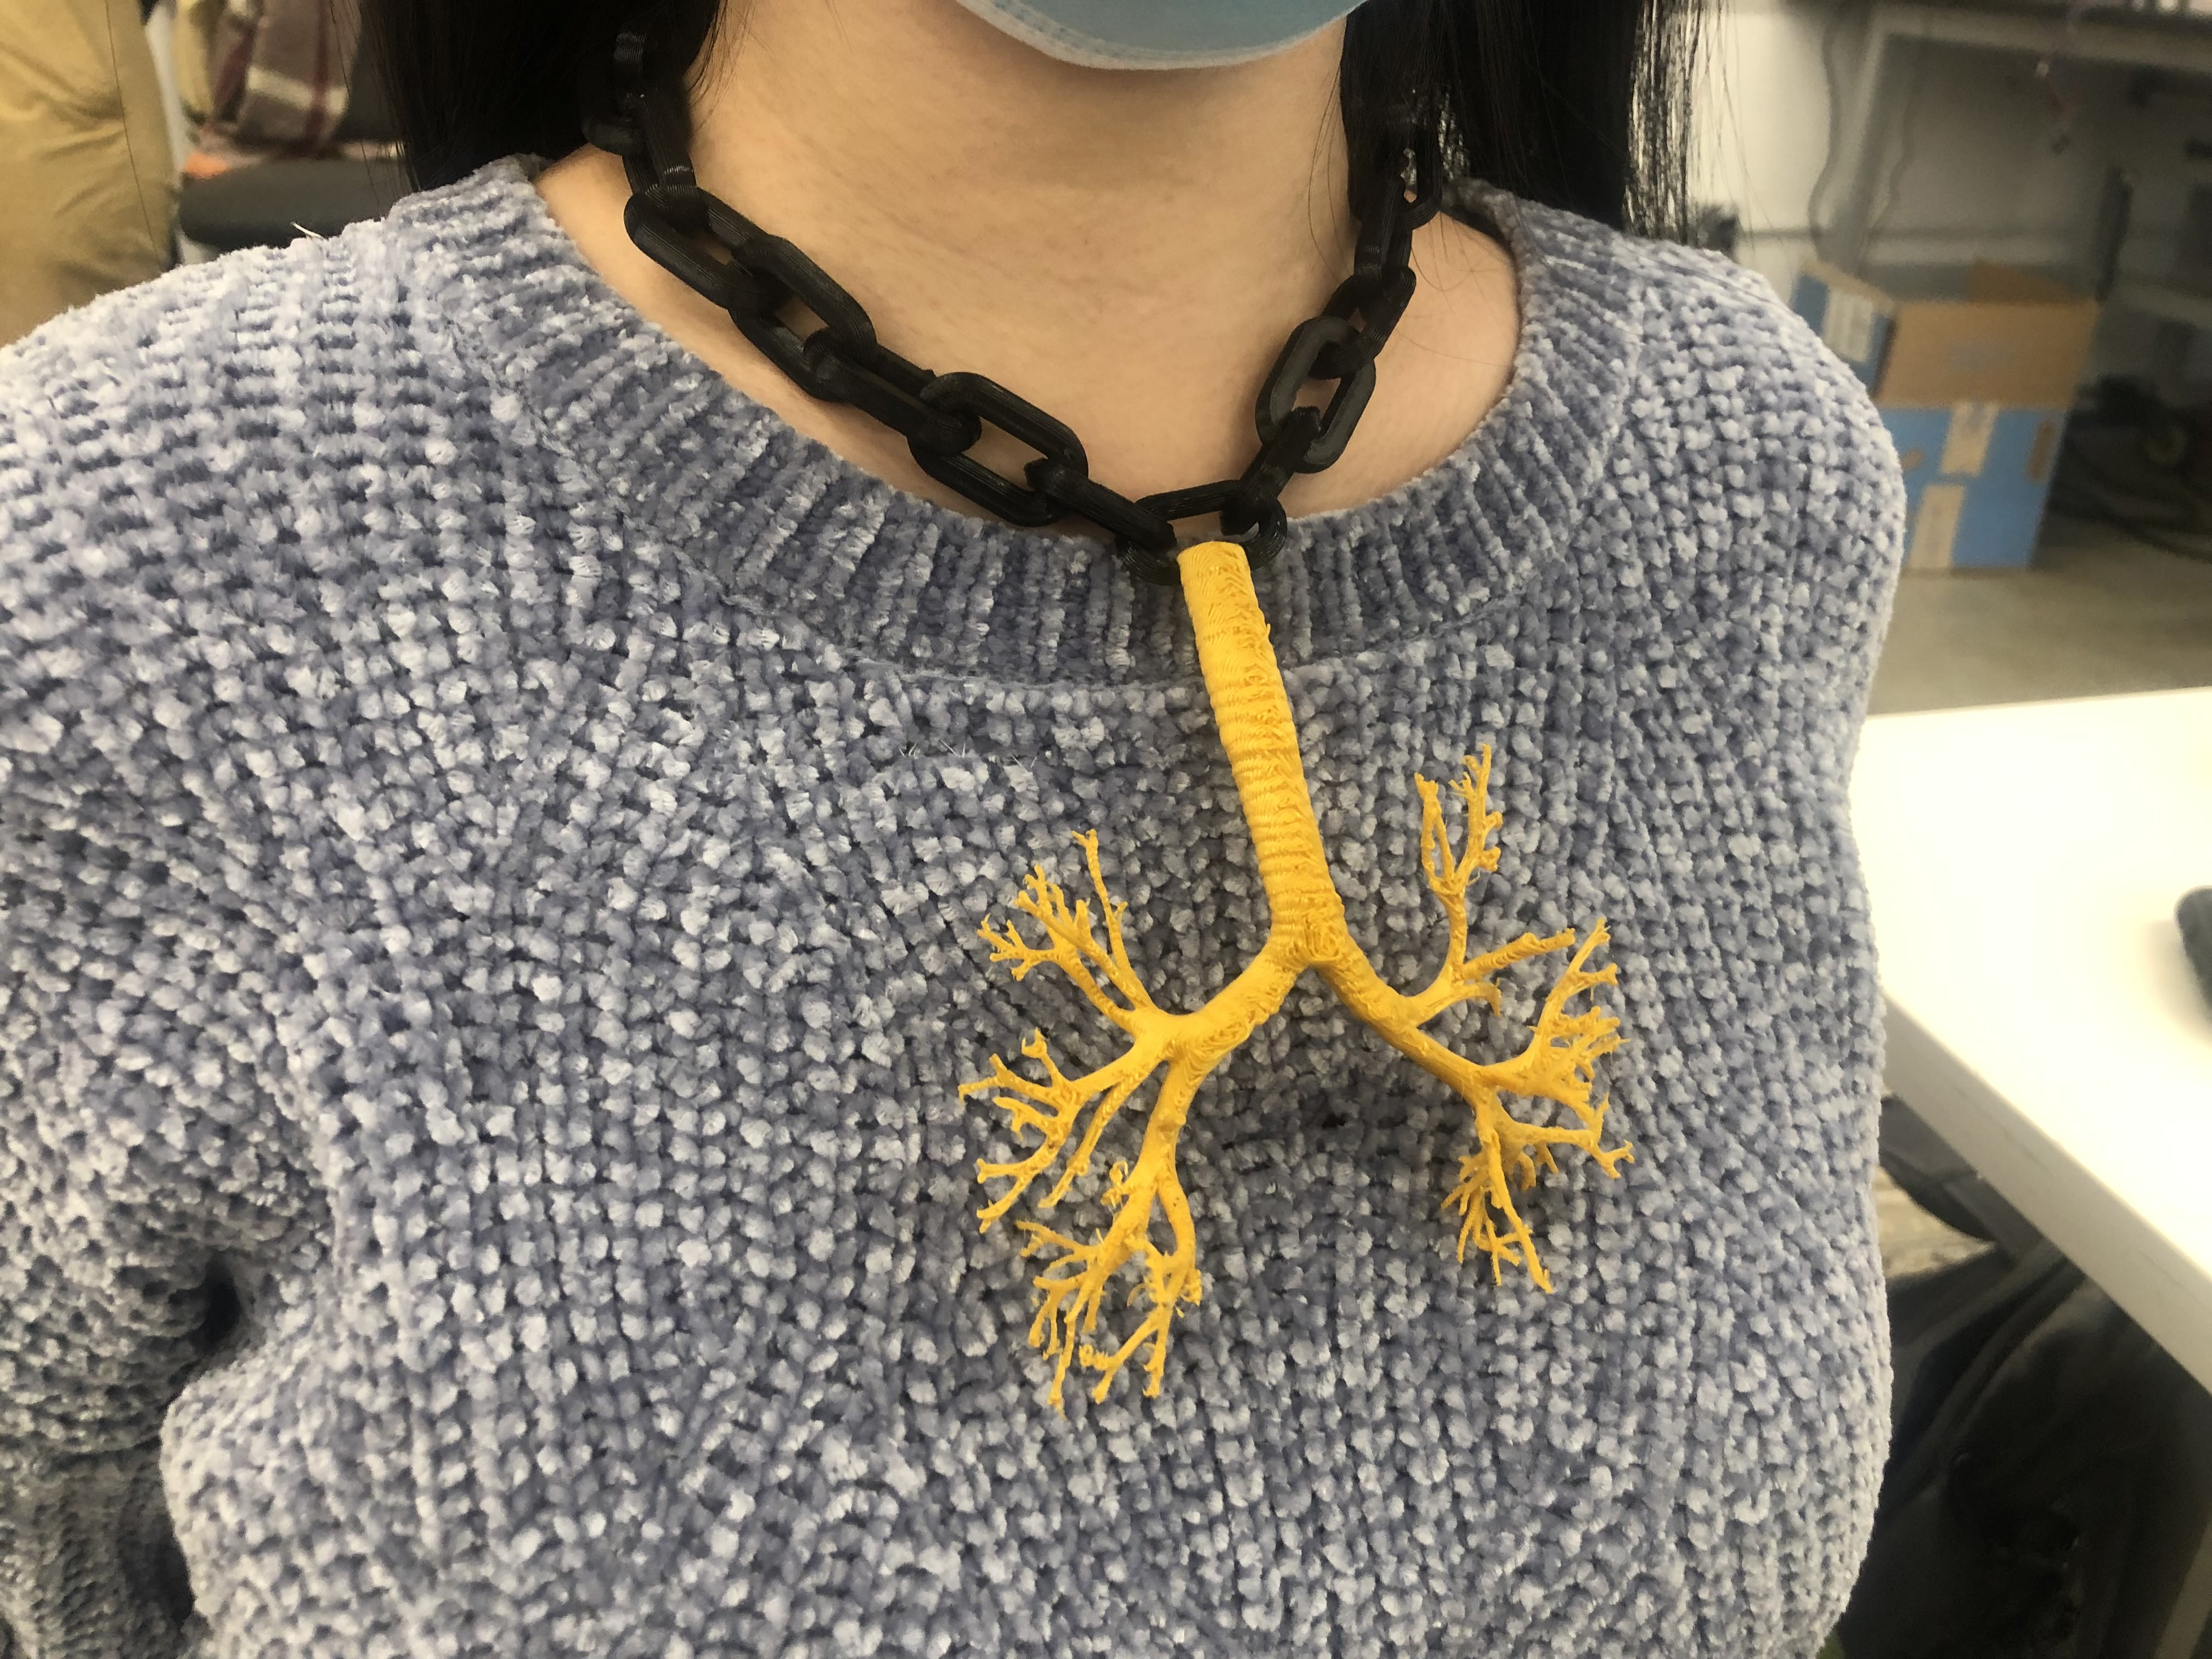 The size of the bronchial tree ended up a lot smaller than the original inspiration, mainly due to the small print bed of the FlashForge. In future, I might cut the piece into 2 before printing the lung halves larger. Overall, I am happy I was able to replicate such an intricate form with the 3D printers. It definitely served as proof as concept for a number of designs. The 3D printer has the clear advantage when fabricating more complex 3D models. However, the 3D printer is disadvantaged by the size of the printerbed and the generally long print times. Additionally, for more refined needs, say if I was machining a part for a motor, I would need to be much more careful with the print settings.
Photogrammetry
As second assignment for this week was to scan an object using a phtoogrammetry application. I own an iPhone 8, which I learned does not have many of the sensing features that new photogrammetry apps rely on. After downloading and failing with a number of free apps from the App store, I finally got a successful scan using an app called MeshVideo. Gabby kindly lent me her 3D printed octopus which I set on a circular stool to create a make-shift 360 photobooth. I took a total of 35 images from a variety of angles. The processing in-app took about 1 hour. The app allowed me to export a video or a folder with a .obj and .png file. I tried and failed to get the .obj to display straight through .html using Model Viewer, but my efforts were thrawted by an error that I supposedly can solve in Blender, but that may be can of worms for another day. The legs of the octopus were captured well, although the back of its head was done in a little. For a model produced from 30 images, I was impressed with the result.